Sunday, May 29, 2011

Happy Anniversary!!

Let me begin by telling you that my parents have been married FOREVER!! Literally - this is not an exaggeration!! Well, maybe a little bit . . . They were married when my mom was only 17 and they were married 16 years before I was born so on June 3, they will have been married 56 years!! Isn't that amazing?! In other news, my goal is to make one card per day. I know this won't happen every day, but I am desperate to get back into papercrafting on a semi-regular basis and I'm hoping this little goal will help me do that. So, today's card is for my parents' upcoming anniversary. I found my inspiration on SCS in the form of this card by Sharon Johnson whose blog I believe I used to follow! I hope my sweet parents have a wonderful anniversary!!

Saturday, May 28, 2011

Party Hearty!!

I have so missed my daily stalking of my favorite blog, Me, My Stamps and I!! But today, I needed a birthday card for a friend and I had a little time to make one, so I looked to see what Chat had been up to. After scrolling through several of her most recent beautiful projects, I found this one that I loved and had all of the "ingredients" needed to make it! I love how Chat used the row of party hats to create a banner just by closely trimming them out. Super cute and simple! Thanks for stopping by!!

Tuesday, May 24, 2011

Welcome Home, Wayward Stamper (part 2)

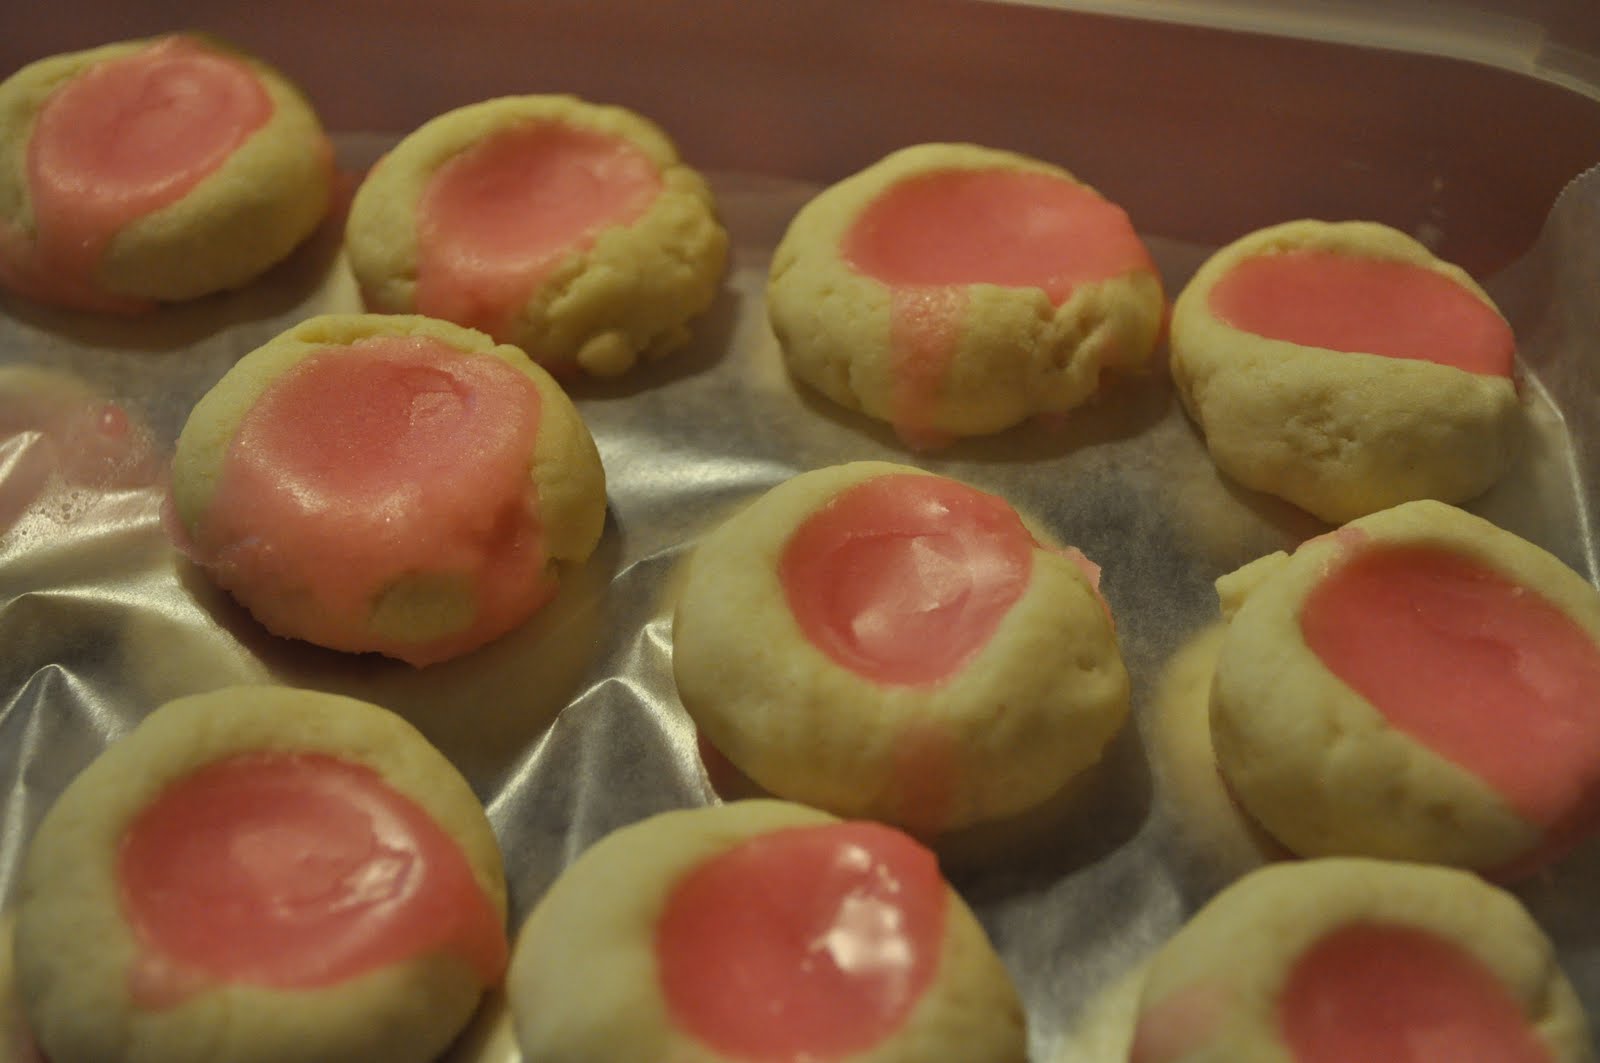
I know you're tired of looking at those thumbprint cookies! They're pretty, but not very exciting, so here is the card I made today for a friend who recently lost her grandmother. Branch Out is a wonderful stamp set to use when you haven't stamped in awhile, but I still had to consult SCS for an idea. I found this beautiful card and thought it was a perfect sympathy card. I sponged the background instead of brayering it like the original. I love Cameo Coral and Certainly Celery together, but I think Blush Blossom is a non-color and not one I use very often. I might try a different background color if I make this card again. Thanks for stopping by!

Thursday, April 21, 2011

A Blast from the Past

I have lived in Knoxville my entire life, except for a brief stint in Greenville, SC, for a year of college. As a kid, my very favorite cookie was the thumbprint cookies made and sold at Wade's Bakery and Fountain City Bakery in town. They were delicate little cookies with shiny, sweet, colorful glaze on top that was perfectly set and very delicious. These bakeries have long since gone out of business and those perfect little thumbprint cookies have been very hard to find over the years. But I recently found a recipe on Comfy in the Kitchen for these little gems and couldn't wait to bake them today. My first batch wasn't very good - a bit dry for my taste. So I added a bit of heavy cream to the remaining dough and the rest of the cookies turned out delicious.

Thumbprint cookies
1/2 cup powdered sugar
1 c. margarine or butter
1 tsp. vanilla
2 1/2 cups flour

Frosting
1 cup powdered sugar
1/2 cup granulated sugar
1 TBS Karo Syrup
1/8 cup water
Food coloring of your choice... you can also use sprinkles!

For frosting - mix all ingredients together in a bowl until smooth, then add 1 drop of food coloring. You can divide the frosting into several bowls to make more than one color.

Heat oven to 350 degrees. Cream together butter and powdered sugar and vanilla then gradually add flour.  If the dough is too crumbly, you can add 1-4 tsp. of milk.  Roll dough into 1/2 inch balls and place 2 inches apart on cookie sheet.  With your thumb, make imprint in the center of each cookie. Bake on parchment paper for about 10 minutes (do not over bake).  Once the cookies are cool, fill each cookie with about 1 tsp or more of frosting and add sprinkles, is desired. Let frosting set for about 30 minutes.

These cookies would make BEAUTIFUL Easter treats, especially if frosted with a variety of pastel colors!

Wednesday, April 20, 2011

More Easter Treats

Since Bailey was little, I've made an Easter bunny cake every year. They are easy to make, but some have turned out better than others. The one I made when Bailey was about 2.5 was especially problematic. For some reason, the color of the jelly beans I used to decorate the cake "bled" into the white frosting, so the bunny's mouth looked like it was literally bleeding. Thus, the Easter of the Bleeding Bunny Cake! Last year, we made a cake to take to our local Ronald McDonald House, and when we got there, it literally fell apart! I was so embarassed! We tried to put it back together, but it still looked pretty motley. Anyway, this year I decided an easier treat might work better, so I made a batch of Rice Krispie treats and cut them out with a bunny-shaped cookie cutter that Bailey can now decorate. I sure hope our friends at RMDH like them!

SERIOUS BROWNIES!

I recently stumbled upon an AMAZING food blog called Comfy in the Kitchen that has a multitude of amazing recipes. This one for Peanut Butter Truffle Brownies yields the most amazing brownies I have even had and that's saying a lot considering my previous favorite brownies were Paula Deen's Symphony Brownies, which are also to-die-for! I made the Peanut Butter Truffle Brownies much, much easier by making Duncan Hines Fudge Brownies first and them following the rest of the recipe for the filling and the topping. I could eat the entire pan, so I am wisely giving some away as quickly as possible!

Peanut Butter Truffle Brownies

For the Brownies:
1 cup butter
2 cups sugar
3 eggs
3 teaspoons vanilla
2/3 cup cocoa powder
1 cup all purpose flour
1/2 teaspoon salt
1/2 teaspoon baking powder

For the Peanut Butter Filling:
1/2 cup butter, softened
1/2 cup creamy peanut butter
2 cup powdered sugar
2-3 teaspoons milk

For the Ganache Topping:
1/4 cup creamy peanut butter
2 cups semisweet chocolate chips
1/4 cup butter
2 tablespoons heavy whipping cream

1.Preheat oven to 350F. Butter the bottom and sides of a 9 by 13 inch metal baking pan. Put a long piece of parchment paper in the bottom of the pan, letting the parchment extend up two sides of the pan and overhang slightly on both ends. (This will make it easy to remove the bars from the pan after they have baked.) Butter the parchment.

2.In a medium saucepan over medium heat, melt the butter. Remove from heat and add the sugar; stir to combine. Beat in eggs and vanilla until combined. Mix in cocoa, baking powder and salt. Add flour and stir until just combined and no streaks of dry ingredients remain. Pour into prepared pan and spread into an even layer. Bake for 25-30 minutes. Let cool completely in pan on a cooling rack.

3.While the brownies are cooling, make the peanut butter filling. In the bowl of a stand mixer fitted with the paddle attachment, combine the ingredients and beat until smooth. Add more milk if necessary to make it spreadable. Spread in an even layer over the brownies. Place in the refrigerator until filling is set, about 30 minutes.

4.While the filling is setting, make the ganache, combine the ingredients in a double boiler or in a microwave safe bowl. Melt together and combine. Pour the ganache over the top and spread gently. Return to the fridge until set.

Tuesday, April 19, 2011

Happy Anniversary!

I've mentioned my sweet friend, Karen, several times on this blog and since today is her and her husband, John's anniversary, I made this lovely toile card that I saw recently on a blog (I'm sorry I can't remember which one!). I think I even incorporated the faux fabric technique that was on Splitcoast Stampers recently. How cool is that? I really love how the embossing folder adds beautiful texture to the stamped image. Come back tomorrow for the very best brownie recipe in the entire world!!

Wednesday, April 6, 2011

One Sharp Card!

My sweet friend, Karen, who I've mentioned on my blog before, had a birthday on March 25 and while I had good intentions of getting her gift to her on time, it simply didn't happen. But, it turned out to be a pretty neat gift that she really liked. Best of all, her card coordinated with the theme of the present! Karen & I have taken a cooking class together and we're going to take another one next month called Knife Skills. Chris's uncle makes beautiful wooden cutting boards, so I asked him to make one for Karen and then I made her this ADORABLE apron card to go with it!! I haven't made one of these cards in ages and had actually forgotten they existed until I rummaged through my inspiration stash and found one my friend, Cele, made for me years ago. I just love it when a plan comes together!!

Tuesday, April 5, 2011

A cool sip of Green Tea

My dear sweet mama placed a card order and it was just what I needed to get a little mojo flowing! I went to my fave blog and found this card. I LOVE the Green Tea designer series paper - blues and greens have always been my favorite color palette - cool & refreshing. This layout is simple and striking and would adapt to any occasion. Have a great week!

Monday, April 4, 2011

A Little Quilty

I need several cards this week for various occasions and while stalking another of my favorite blogs, Inking Idaho, I found these beautiful quilted cards that inspired me to create my own. I've made this type of card before, but it's been awhile, so it seemed new to me! I love this color combo - Baja Blue and Chocolate Chip - and using a 1.25" square punch makes this card a cinch to reproduce. I like to build my card on a piece of copy paper so I can trim the edges or cut the quilted piece into a shape like the last card in this post. So many ways to be creative with just a few simple supplies! Have a great day!

Sunday, April 3, 2011

A little blog-stalking . . .

So I've gotten back into blog-stalking and I am finding that I have missed so much during these last several months!! I found this card on the Inkadinkado website (not sure how I found my way there!). I just love cards that use some that designer paper I have laying around. I've been hoarding it for far too long, too afraid to cut those gorgeous 12x12 sheets for fear of not having full sheets when I scrapbook, but I have banished those thoughts from my pretty little head. I can't wait to dig into new papercrafting adventures! Thanks for stopping by!

Saturday, April 2, 2011

Inspired by Archivers


Since Miss Morgan was born in September, I have done very little crafting because any mojo I can muster has been used on other projects, like cooking, cleaning, and taking care of the young 'uns! So, needless to say, when we decided to go to Atlanta for a few days over Spring Break, I knew a trip to Archiver's was a must! I found so many amazing stamps & cool tools to add to my vast collection and rekindle my crafting mojo! I was instantly attracted to this cute Easter bunny stamp set and coordinating honeycomb paper that you can cut into any shape imaginable. It's pretty pricey at $6.50 per pack, but I couldn't resist buying all the items I needed to make this sweet little 3-D carrot inside my card! Notice the grass? It was made using Martha's Stewart's new grass/fringe scissors. They rock in a whole new way! I absolutely love them! If you've ever tried to make grass using regular scissors, you know it is impossible to create uniform blades. Thanks for stopping by - have a great weekend!

Monday, March 28, 2011

Ultimate Mac & Cheese

I LOVE macaroni and cheese! It is the ultimate comfort food, and I love trying new recipes for it, searching for the perfect one! The cooks on Food Network make it look so easy, but my mac & cheese never turns out correctly - the sauce is always grainy or chunky instead of smooth and it just lacks SOMETHING! I also love Tyler Florence. He is so handsome, he's from South Carolina (love me some Southern boys!), and besides being a fabulous cook, he also seems to be a really good guy. So when I found the recipe for his "ultimate" mac & cheese, I knew I had to try it. Since I never have any luck making this dish, I decided to read the comments for pointers and I am so glad I did! One home cook wrote that in order to achieve a smooth sauce, it's important to remove the milk mixture from the heat and very slowly add the shredded cheese, whisking until the cheese is melted and incorporated before adding more. This technique TOTALLY works! I am amazed! To take it up a notch to almost gourmet proportions, I added some chopped Benton's bacon, the Holy Grail of pork, to the mix. And Panko . . . Panko makes everything magically delicious . . . so I sprinkled a bit on top for crunchiness. I am literally chomping at the bit to get a heaping helping of this mac & cheese and I have a big ol' batch in the oven right now. I think it might just be the ultimate - thanks, Tyler!!

Sunday, March 27, 2011

Be Still, My Heart!

I don't know how it happened: it was a busy day of church (Morgan was christened), lunch out with my sweet parents, a few errands, and Morgan's micro-nap, but I actually made a card!! I have a very, very dear friend whose husband passed away almost a year ago, so I wanted to make a special card to let her know how much we love her and miss her husband. I haven't been blog-stalking much lately, so I went back to my old favorite, Me, My Stamps and I, and found this card that I thought I could CASE in some form or fashion. I like the combination of Old Olive & Ballet Blue and, since my flowers were a little hinky, I was glad I had clear crystal brads to put in the centers. Thanks for stopping by!

Tuesday, February 22, 2011

One Lone Valentine

So here's a pic of the only Valentine I made this year. It's not terribly inspired, but I felt pretty good to get three of these made. I'm still not getting much around here with my sweet baby around, but she is completely wonderful, so I'll make the sacrifice in hopes that some day, she will be able to entertain herself for brief periods of time and I can papercraft once more!!

Tuesday, February 15, 2011

Happy Heart Day! (a day late!)


I only made three Valentines to send this year and I mailed them before I took a picture - rookie mistake, don't you think?! But, I did get a picture of the little boxes of truffles I made and I think they are super cute! One thing I learned is that wearing gloves if the BEST way to roll the truffles out without making a gigantic mess! This is a recipe I found on-line a few years ago and it's one of my favorites. They are surprisingly simple to make and taste delicious!

CHOCOLATE CARAMEL PEANUT TRUFFLES
by Sara Moulton

1 cup sugar
2/3 cup heavy cream
9 ounces bittersweet chocolate, finely chopped
2 tablespoons creamy peanut butter
1/4 teaspoon table salt
1 teaspoon vanilla extract
1/2 cup finely chopped peanuts for coating

Place the sugar in a heavy saucepan. Cook over medium-high heat, stirring just until the sugar has melted. Continue cooking, swirling the pan often, until the sugar is a dark golden caramel. Remove the pan from the heat and carefully pour in the cream. Return the pan to the heat and simmer, stirring, until the caramel has dissolved.

Remove the pan from the heat and, while hot, stir in the chocolate, peanut butter, salt, and vanilla. Let stand for about 5 minutes or until the chocolate and peanut butter have dissolved. Transfer to a bowl and cool to room temperature. Cover the bowl with plastic wrap and chill until firm, about 2 hours.

Use a small spoon to scoop out the truffles and form into 1-inch balls. Roll the truffles in the peanuts and transfer to a tray covered with wax paper. Chill until firm, about 1 hour. Store in an airtight container for up to 2 weeks. Makes about 40 truffles.

ENJOY!!

Saturday, February 5, 2011

Happy Anniversary, Papertrey Ink!!

It's anniversary time over at Papertrey Ink and Nichole has challenged us to pick our favorite Papertrey project from the last year and post it for a chance to win an AMAZING prize pack.

I LOVE this card because of the beautiful spring colors (desperately needing those right now!!) and the PTI floral stamp set, Life. Thanks for stopping by!

Thursday, February 3, 2011

Delightful & Delicious

One of my sweet friends gave me a Starbucks gift card for my birthday recently, so I decided to make her a coffee-themed thank you note. I LOVE my Verve set called Delightful & Delicious and I've bookmarked the company's gallery for the set. I chose this card to make for my friend and while it took waaaaaaay too long to make, I'm pretty happy with the way it turned out. I sure don't have the patience for all those layers any more!!

Wednesday, February 2, 2011

Diet Busters!

A friend of a friend recently posted a chocolate chip cookie recipe on FB and, since I have a terrible time making cookies successfully (except cake mix cookies), I decided to print it out and give it a try one day. Well, "one day" turned into last night!! The recipe calls for 3 sticks of butter - my heart goes pitter patter (probably because I'm going into cardiac arrest!). It also calls for 3 different kinds of chips - milk, semi-sweet, and white chocolate. YUM! Since I didn't want that many ingredients to be ruined by my ineptitude, I researched on-line whether cookies should be baked on Silpat, which is a silicone baking mat that prevents foods from sticking. I am so glad I did my homework, because everything I read recommended baking on parchment paper, NOT Silpat. So I gave it a try, and the cookies came out beautifully!! Parchment paper is the key to cookies that don't spread out all over the pan (that ALWAYS happens to me!) and are a cinch to remove from the baking sheet. And let me tell you, these cookies are magically delicious!! This is definitely a recipe I will make again. Bailey took some to her teachers today and I hope they like them as much as we do. Chris even ate some and he's not typically a sweets eater - I know, right?!?!

Here's the recipe, 'cause I know you want it!

CHOCOLATE CHIP COOKIES
4 cups all-purpose flour
1 tsp baking powder
1 tsp baking soda
1 1/2 cups butter, softened
1 1/4 cup granulated sugar
1 1/4 cup packed brown sugar
2 large eggs
1 tbsp vanilla extract
1 cup Nestle toll house milk chocolate morsels
1 cup Nestle toll house semi-sweet chocolate morsels
1/2 cup nestle toll house premier white morsels
1 cup chopped nuts (optional)

1. preheat oven to 375 degrees
2. combine flour, baking powder and baking soda in medium bowl. beat butter, granulated sugar and brown sugar in larger mixer bowl until creamy. beat in eggs and vanilla. gradually beat in flour mixture. stir in morsels and nuts. drop by level 1/4 cup measure 2 inches apart onto parchment paper.
3. bake for 13 to 14 minutes or until VERY light brown around the edges. don't over cook. they will harden some as the cool. cool on baking sheets for two minutes then remove to wire racks to cool completely.

ENJOY!!

Tuesday, February 1, 2011

Branching Out . . . Once Again!

I often see cards and projects that seem simply too complicated or difficult for me to make. This may seem ridiculous because what could possibly be hard about paper, stamps, & ink? So many things!! I have recently developed a new fascination with sponging - I love the softness it creates and the warmth of having a hint of color versus a stark white background. So, as I was looking through the numerous projects I've saved to my hard drive, I was drawn to a card very similar to this one and decided to take the plunge. It was so much easier than I thought it would be and turned out beautifully. Branch Out is an amazing stamp set, and randomly stamping all those beautiful colors on a humble brown tree trunk is almost therapeutic! The hill and the grass are done with markers in a very free form way, and the red boots add a bit of whimsy that's unexpected on a sympathy card. I'm so sorry to have had to make this card for a friend who recently lost her father, but I hope the colors and the idea of a tree representing life will comfort her during this difficult time. I might just be on a roll here so come back soon to see what I'm up to!!